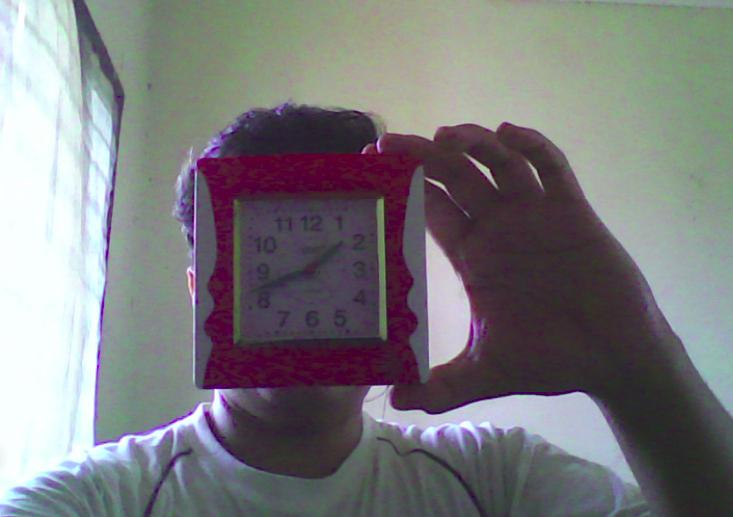
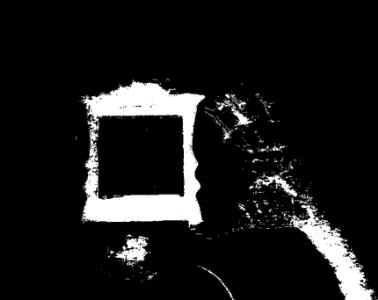
目标
在本教程中,您将学习如何:
- 使用OpenCV函数cv :: inRange执行基本阈值操作
- 根据其具有的像素值的范围来检测对象
理论
- 在上一个教程中,我们了解了如何使用cv :: threshold函数执行阈值处理。
- 在本教程中,我们将学习如何使用cv :: inRange函数。
- 该概念保持不变,但现在我们添加了我们需要的像素值范围。
码
教程代码如下所示。您也可以从这里下载
#include "opencv2/imgproc.hpp"
#include "opencv2/highgui.hpp"
#include <iostream>
#include <stdlib.h>
using namespace std;
using namespace cv;
void on_low_r_thresh_trackbar(int, void *);
void on_high_r_thresh_trackbar(int, void *);
void on_low_g_thresh_trackbar(int, void *);
void on_high_g_thresh_trackbar(int, void *);
void on_low_b_thresh_trackbar(int, void *);
void on_high_b_thresh_trackbar(int, void *);
int low_r=30, low_g=30, low_b=30;
int high_r=100, high_g=100, high_b=100;
int main()
{
    Mat frame, frame_threshold;
    VideoCapture cap(0);
    namedWindow("Video Capture", WINDOW_NORMAL);
    namedWindow("Object Detection", WINDOW_NORMAL);
    //-- Trackbars to set thresholds for RGB values
    createTrackbar("Low R","Object Detection", &low_r, 255, on_low_r_thresh_trackbar);
    createTrackbar("High R","Object Detection", &high_r, 255, on_high_r_thresh_trackbar);
    createTrackbar("Low G","Object Detection", &low_g, 255, on_low_g_thresh_trackbar);
    createTrackbar("High G","Object Detection", &high_g, 255, on_high_g_thresh_trackbar);
    createTrackbar("Low B","Object Detection", &low_b, 255, on_low_b_thresh_trackbar);
    createTrackbar("High B","Object Detection", &high_b, 255, on_high_b_thresh_trackbar);
    while((char)waitKey(1)!='q'){
        cap>>frame;
        if(frame.empty())
            break;
        //-- Detect the object based on RGB Range Values
        inRange(frame,Scalar(low_b,low_g,low_r), Scalar(high_b,high_g,high_r),frame_threshold);
        //-- Show the frames
        imshow("Video Capture",frame);
        imshow("Object Detection",frame_threshold);
    }
    return 0;
}
void on_low_r_thresh_trackbar(int, void *)
{
    low_r = min(high_r-1, low_r);
    setTrackbarPos("Low R","Object Detection", low_r);
}
void on_high_r_thresh_trackbar(int, void *)
{
    high_r = max(high_r, low_r+1);
    setTrackbarPos("High R", "Object Detection", high_r);
}
void on_low_g_thresh_trackbar(int, void *)
{
    low_g = min(high_g-1, low_g);
    setTrackbarPos("Low G","Object Detection", low_g);
}
void on_high_g_thresh_trackbar(int, void *)
{
    high_g = max(high_g, low_g+1);
    setTrackbarPos("High G", "Object Detection", high_g);
}
void on_low_b_thresh_trackbar(int, void *)
{
    low_b= min(high_b-1, low_b);
    setTrackbarPos("Low B","Object Detection", low_b);
}
void on_high_b_thresh_trackbar(int, void *)
{
    high_b = max(high_b, low_b+1);
    setTrackbarPos("High B", "Object Detection", high_b);
}
说明
1、我们来看一下程序的一般结构:
- 创建两个Matrix元素来存储帧
Mat frame, frame_threshold;
- 从默认捕获设备捕获视频流。
VideoCapture cap(0);
- 创建一个窗口以显示默认帧和阈值帧。
    namedWindow("Video Capture", WINDOW_NORMAL);
namedWindow("Object Detection", WINDOW_NORMAL);- 创建轨迹设置RGB值的范围
    //-- Trackbars to set thresholds for RGB values
    createTrackbar("Low R","Object Detection", &low_r, 255, on_low_r_thresh_trackbar);
    createTrackbar("High R","Object Detection", &high_r, 255, on_high_r_thresh_trackbar);
    createTrackbar("Low G","Object Detection", &low_g, 255, on_low_g_thresh_trackbar);
    createTrackbar("High G","Object Detection", &high_g, 255, on_high_g_thresh_trackbar);
    createTrackbar("Low B","Object Detection", &low_b, 255, on_low_b_thresh_trackbar);
createTrackbar("High B","Object Detection", &high_b, 255, on_high_b_thresh_trackbar);- 直到用户想要退出程序才能执行以下操作
        cap>>frame;
        if(frame.empty())
            break;
        //-- Detect the object based on RGB Range Values
inRange(frame,Scalar(low_b,low_g,low_r), Scalar(high_b,high_g,high_r),frame_threshold);- 显示图像
        //-- Show the frames
        imshow("Video Capture",frame);
imshow("Object Detection",frame_threshold);- 对于控制较低范围的轨迹栏,例如红色值:
void on_low_r_thresh_trackbar(int, void *)
{
    low_r = min(high_r-1, low_r);
    setTrackbarPos("Low R","Object Detection", low_r);
}- 对于控制上限的轨迹栏,例如红色值:
void on_high_r_thresh_trackbar(int, void *)
{
    high_r = max(high_r, low_r+1);
    setTrackbarPos("High R", "Object Detection", high_r);
}- 有必要找到最大值和最小值,以避免诸如阈值的高值变得低于低值的差异。
结果
- 编译此程序后,运行它。该程序将打开两个窗口
- 当您从轨迹栏设置RGB范围值时,结果框架将在另一个窗口中可见。


以上内容是否对您有帮助:


更多建议: