

第06章-CSS3布局属性

第06章-前端核心技术-CSS3布局属性
项目经理(作者):张明星
学习目标
- 了解定位的概念
- 掌握如何实现元素的任意布局
重点难点
- 掌握实际开发特效的实现
难点 - 掌握CSS复杂选择器的使用
重点 - 掌握CSS属性选择器的使用方法
- 掌握CSS特效制作的方法
重点难点
CSS Float(浮动)
Float(浮动),只能使元素向左或向右移动,其周围的元素的内容会被浮动的元素的内容挤到周围。
Float(浮动),往往是用于图像,但它在布局时一样非常有用。
| 属性 | 描述 |
|---|---|
| float | 使元素浮动到左边或者右边(left、right) |
- 浮动元素只能左右移动而不能上下移动。
- 一个浮动元素会尽量向左或向右移动,直到它的外边缘碰到包含框或另一个浮动框的边框为止。
- 浮动元素之后的元素将围绕它。
- 浮动元素之前的元素将不会受到影响。
- 浮动元素的空间将不存在,所以这个元素后边的元素会占据浮动元素原本的空间,导致浮动元素覆盖后面的元素,后面的元素需要使用clear属性清除浮动的覆盖。
案例01
<!DOCTYPE html>
<html>
    <head>
        <meta charset="UTF-8">
        <title></title>
        <style type="text/css">
            img{
                float: right;
            }
        </style>
    </head>
    <body>
        <img src="image/avatar.jpg"/>
        觉得很卡机的话那的艰苦撒旦的艰苦撒谎空间大倒萨立刻就发生范德萨浪费
        疯狂的思路发生分类考试的价格快速拉高饿死了咖啡连锁店过的思路开发公
        疯狂的思路发生分类考试的价格快速拉高饿死了咖啡连锁店过的思路开发公
        疯狂的思路发生分类考试的价格快速拉高饿死了咖啡连锁店过的思路开发公
        疯狂的思路发生分类考试的价格快速拉高饿死了咖啡连锁店过的思路开发公
    </body>
</html>
效果展示
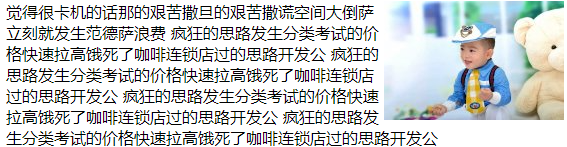
图片浮动到最右边,将正常排版的文字挤到旁边,并不会覆盖住文字。
案例02
<!DOCTYPE html>
<html>
    <head>
        <meta charset="UTF-8">
        <title></title>
        <style type="text/css">
            ul{
                list-style-type: none;
            }
            li{
                float: left;
                padding: 20px;
                background-color: #DC143C;
                color: white;
            }
            h4{
                background-color: blueviolet;
                color: white;
            }
        </style>
    </head>
    <body>
        <ul>
            <li>家具</li>
            <li>服饰</li>
            <li>汽车</li>
            <li>装饰</li>
            <li>鞋包</li>
            <li>儿童</li>
        </ul>
        <h4>内容</h4>
    </body>
</html>
效果展示

清除浮动
清除浮动的属性一般用于浮动元素后面的元素,用户清除上面浮动元素对其产生的影响
| 属性 | 描述 |
|---|---|
| clear | 清除上面浮动元素的影响(left、right、both) |
案例03
<!DOCTYPE html>
<html>
    <head>
        <meta charset="UTF-8">
        <title></title>
        <style type="text/css">
            ul{
                list-style-type: none;
            }
            li{
                float: left;
                padding: 20px;
                background-color: #DC143C;
                color: white;
            }
            h4{
                background-color: blueviolet;
                color: white;
                clear: both;/*清除上面浮动元素的影响,并从新的行开始*/
            }
        </style>
    </head>
    <body>
        <ul>
            <li>家具</li>
            <li>服饰</li>
            <li>汽车</li>
            <li>装饰</li>
            <li>鞋包</li>
            <li>儿童</li>
        </ul>
        <h4>内容</h4>
    </body>
</html>
效果展示

总结
- 浮动的特征:
- 把任何元素看成:
元素 = 空间 + 内容 - 浮动的元素只能浮动到左边 或者 右边,不能居中
- 浮动后的元素的空间不存在,但内容还存在
- 浮动元素的内容会和下面的元素显示在同一行
- 浮动元素的内容会把下面的元素的的内容挤压到旁边
- 把任何元素看成:
- 清除浮动
- 想让浮动的元素独占一行,不影响后面的元素排版,需要给后面的第一个元素加
clear:bath清除浮动 - 当一个元素的所有子元素都浮动后,子元素的空间都不存在了,这个元素的高度会变为
0px,导致这个元素的背景等看不到,需要给这个元素加overflow:hidden;或者display:inline-block;。
- 想让浮动的元素独占一行,不影响后面的元素排版,需要给后面的第一个元素加
CSS position (定位)
position 属性指定了元素的定位类型。
| 属性 | 描述 |
|---|---|
| Static | 静态定位,默认值,就是没有定位。 |
| Relative | 相对定位,相对当前元素位置 |
| Fixed | 固定定位,在页面上固定的位置出现 |
| Absolute | 绝对定位,相对于上级已经定位的元素的位置 |
static 静态定位(默认)
HTML元素的默认值,即没有定位,元素出现在正常的流中。
静态定位的元素不会受到 top, bottom, left, right影响。
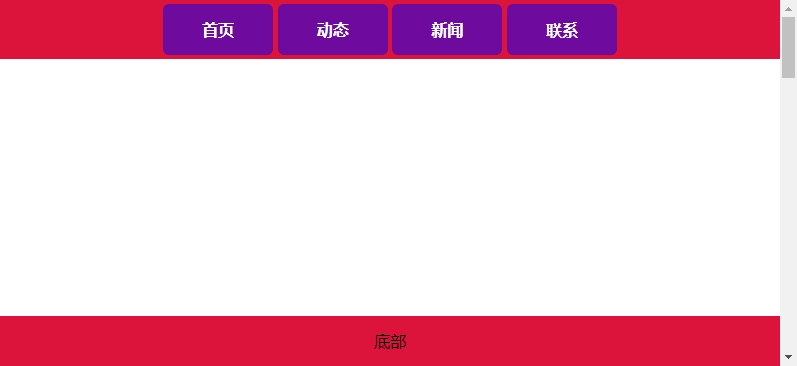
fixed 固定定位
元素的位置相对于浏览器窗口是固定位置。
即使窗口是滚动的它也不会移动。
案例04
<!DOCTYPE html>
<html>
    <head>
        <meta charset="UTF-8">
        <title></title>
        <style type="text/css">
            body{
                height: 2000px;
                margin: 0;
            }
            ul{
                list-style-type: none;
                margin: 0;
                padding: 0;
                text-align: center;
                background-color: #DC143C;
                width: 100%;
                position: fixed;
                top: 0;
                padding: 4px 0;
            }
            li{
                display: inline-block;
                padding: 15px 5%;
                background-color: rgba(0,0,255,0.5);
                color: white;
                font-weight: bold;
                border-radius: 6px;
            }
            li:hover{
                background-color: rgba(0,255,0,0.5);
                cursor: pointer;
            }
            h4{
                text-align: center;
            }
            .bottom{
                position: fixed;
                background-color: #DC143C;
                width: 100%;
                bottom: 0;
                line-height: 50px;
                text-align: center;
            }
        </style>
    </head>
    <body>
        <ul>
            <li>首页</li>
            <li>动态</li>
            <li>新闻</li>
            <li>联系</li>
        </ul>
        <div class="bottom">
            底部
        </div>
    </body>
</html>
效果展示
relative 相对定位
相对定位元素的定位是相对其正常位置。
相对定位元素经常被用来作为绝对定位元素的容器块。
可以移动的相对定位元素的内容和相互重叠的元素,它原本所占的空间不会改变。
absolute 绝对定位
绝对定位的元素的位置相对于最近的已定位父元素,如果元素没有已定位的父元素,那么它的位置相对于<html>
absolute 定位使元素的位置与文档流无关,因此不占据空间。
absolute 定位的元素和其他元素重叠。
案例05
<!DOCTYPE html>
<html>
    <head>
        <meta charset="UTF-8">
        <title></title>
        <link rel="stylesheet" type="text/css" href="2.css"/>
    </head>
    <body>
        <h2>商品分类</h2>
        <ul>
            <li>女装/内衣
                <div class="right">
                    <div class="l">
                        <div class="item">
                            <div class="ll">
                                当季流行>
                            </div>
                            <div class="lr">
                                春季新品商场同款气质连衣裙卫衣时髦外套毛针织衫休闲裤牛仔裤毛呢大衣无痕文胸运动文胸潮流家居服百搭船袜
                            </div>
                        </div>
                    </div>
                    <div class="r">
                        <img src="../day17/image/1-3.jpg"/>
                    </div>
                </div>


            </li>
            <li>男装/运动户外</li>
        </ul>
    </body>
</html>
效果展示

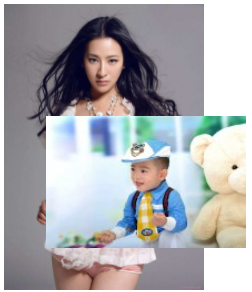
重叠的元素
元素的定位与文档流无关,所以它们可以覆盖页面上的其它元素
z-index属性指定了一个元素的堆叠顺序(哪个元素应该放在前面,或后面)
一个元素可以有正数或负数的堆叠顺序
案例06
<!DOCTYPE html>
<html>
    <head>
        <meta charset="UTF-8">
        <title></title>
        <style type="text/css">
            .img1{
                position: absolute;
                width: 200px;
                left: 50px;
                top: 120px;
                z-index: 2;
            }
            .img2{
                position: absolute;
                width: 200px;
                z-index: -1;
            }
        </style>
    </head>
    <body>
        <img src="image/avatar.jpg" class="img1"/>
        <img src="image/meinv.jpg" class="img2"/>
    </body>
</html>
效果展示
CSS复杂选择器
子元素(后代)选取器
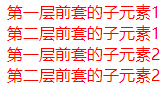
后代选取器匹配元素所有的内部元素,无论嵌套多少层都可以被选择。符号“空格”
案例07
<!DOCTYPE html>
<html>
    <head>
        <meta charset="UTF-8">
        <title>后代选取器</title>
        <style type="text/css">
            #content .child{
                color: red;
            }
        </style>
    </head>
    <body>
        <div id="content">
            <div class="child">
                第一层前套的子元素1
                <div class="child">
                    第二层前套的子元素1
                </div>
            </div>
            <div class="child">
                第一层前套的子元素2
                <div class="child">
                    第二层前套的子元素2
                </div>
            </div>
        </div>
    </body>
</html>
效果展示
直接子元素选择器
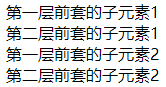
与后代选择器相比,直接子元素选择器(Child selectors)只能选择作为某元素直接子元素,嵌套的不能被选中。
直接子元素使用“>”符号来表示
案例08
<!DOCTYPE html>
<html>
    <head>
        <meta charset="UTF-8">
        <title>直接子元素选择器</title>
        <style type="text/css">
            #content > .child2-1{
                color: red;
            }
        </style>
    </head>
    <body>
        <div id="content">
            <div class="child1-1">
                第一层前套的子元素1
                <div class="child2-1">
                    第二层前套的子元素1
                </div>
            </div>
            <div class="child1-1">
                第一层前套的子元素2
                <div class="child2-1">
                    第二层前套的子元素2
                </div>
            </div>
        </div>
    </body>
</html>
效果展示
相邻兄弟选择器
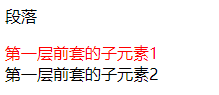
相邻兄弟选择器(Adjacent sibling selector)可选择后面紧接在一个元素后的元素,且二者有相同父元素。只能选择一个。
相邻兄弟选择器使用“+”符号来表示
案例09
<!DOCTYPE html>
<html>
    <head>
        <meta charset="UTF-8">
        <title>相邻兄弟选择器</title>
        <style type="text/css">
            p + .child1-1{
                color: red;
            }
        </style>
    </head>
    <body>
        <div id="content">
            <p>段落</p>
            <div class="child1-1">第一层前套的子元素1</div>
            <div class="child1-1">第一层前套的子元素2</div>
        </div>
    </body>
</html>
效果展示
后续兄弟选择器
后续兄弟选择器选取所有指定元素之后的相邻兄弟元素。
后续兄弟选择器使用“~”符号来表示
案例10
<!DOCTYPE html>
<html>
    <head>
        <meta charset="UTF-8">
        <title>后续兄弟选择器</title>
        <style type="text/css">
            p ~ .child1-1{
                color: red;
            }
        </style>
    </head>
    <body>
        <div id="content">
            <p>段落</p>
            <div class="child1-1">第一层前套的子元素1</div>
            <div class="child1-1">第一层前套的子元素2</div>
        </div>
    </body>
</html>
效果展示

伪类(元素)选择器
| 选择器 | 示例 | 示例说明 |
|---|---|---|
| :checked | input:checked | 选择所有选中的表单元素(单选和复选) |
| :disabled | input:disabled | 选择所有禁用的表单元素 |
| :enabled | input:enabled | 选择所有启用的表单元素 |
| :not(selector) | :not(p) | 选择所有p以外的元素 |
| :in-range | input:in-range | 选择元素值在指定(数字输入框)min和max范围内的值 |
| :out-of-range | input:out-of-range | 选择元素值在指定(数字输入框)min和max范围外的值 |
| :invalid | input:invalid | 选择所有无效的元素 |
| :valid | input:valid | 选择所有有效值的属性 |
| :first-letter | p:first-letter | 选择每个<p> 元素的第一个字母 |
| :first-line | p:first-line | 选择每个<p> 元素的第一行 |
| :last-child | p:last-child | 选择所有p元素的最后一个元素 |
| :last-of-type | p:last-of-type | 选择每个p元素是其母元素的最后一个p元素 |
| :first-of-type | p:first-of-type | 选择每个父元素是p元素的第一个p子元素 |
| :first-child | p:first-child | 选择器匹配属于任意元素的第一个子元素的 <p> 元素 |
| :nth-child(n) | p:nth-child(2) | 选择所有p元素的第二个子元素 |
| :nth-last-child(n) | p:nth-last-child(2) | 选择所有p元素倒数的第二个子元素 |
| :nth-last-of-type(n) | p:nth-last-of-type(2) | 选择所有p元素倒数的第二个为p的子元素 |
| :nth-of-type(n) | p:nth-of-type(2) | 选择所有p元素第二个为p的子元素 |
| :only-of-type | p:only-of-type | 选择p元素在父元素中只有一个类型为p的元素 |
| :only-child | p:only-child | 选择p元素在父元素中只有一个p的元素 |
| :empty | p:empty | 选择所有没有子元素(任何内容)的p元素 |
| :optional | input:optional | 选择没有"required"的元素属性 |
| :required | input:required | 选择有“required”属性指定的元素属性 |
| :read-only | input:read-only | 选择只读属性的元素属性 |
| :read-write | input:read-write | 选择没有只读属性的元素属性 |
| :root | root | 选择文档的根元素 |
| :target | #news:target | 选择当前活动#news元素(点击URL包含锚的名字) |
| :link | a:link | 选择所有未访问链接 |
| :visited | a:visited | 选择所有访问过的链接 |
| :active | a:active | 选择正在活动链接 |
| :hover | a:hover | 把鼠标放在链接上的状态 |
| :focus | input:focus | 选择元素输入后具有焦点 |
| :before | p:before | 在每个<p>元素之前插入内容 |
| :after | p:after | 在每个<p>元素之后插入内容 |
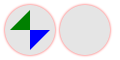
案例11:自定义单选框
<!DOCTYPE html>
<html>
    <head>
        <meta charset="utf-8">
        <title></title>
        <link rel="stylesheet" type="text/css" href="new_file.css"/>
    </head>
    <body>
        <!-- 自定义单选框 -->
        <div class="radio">
            <input type="radio" name="a"/>
            <div class="checked"></div>
        </div>
        <div class="radio">
            <input type="radio" name="a"/>
            <div class="checked"></div>
        </div>
    </body>
</html>
css
.radio{
    width: 50px;
    height: 50px;
    background-color: rgba(0,0,0,0.1);
    position: relative;
    display: inline-block;
    border-radius: 100px;
    box-shadow: 0 0 2px 1px rgba(255,0,0,0.5);
}


.radio input[type=radio]{
    width: 100%;
    height: 100%;
    margin: 0;
    opacity: 0;
    position: absolute;
    left: 0;
    top: 0;
}
.radio .checked{
    position: relative;
}
.radio .checked::before{
    content: "";
    position: absolute;
    width: 0;
    height: 0;
    border-right: 20px solid green;
    border-top: 20px solid transparent;
    right: 25px;
    top: 5px;
    display: none;
}
.radio .checked::after{
    content: "";
    position: absolute;
    width: 0;
    height: 0;
    border-left: 20px solid blue;
    border-bottom: 20px solid transparent;
    left: 25px;
    top: 25px;
    display: none;
}


.radio input[type=radio]:checked+.checked::before{
    display: block;
}


.radio input[type=radio]:checked+.checked::after{
    display: block;
}
效果展示
案例12:提示框文字
<!DOCTYPE html>
<html>
    <head>
        <meta charset="UTF-8">
        <title></title>
        <style type="text/css">
            #content{
                position: relative;
                width: 200px;
            }
            .cart{
                display: none;
                position: absolute;
                top: 0;
                left: 0;
                margin-top: -35px;
                padding: 5px 10px;
                height: 20px;
                background-color: black;
                border-radius: 5px;
                color: white;
            }
            .cart:after{
                content: "";
                border-width: 5px;
                border-style: solid;
                border-color: black transparent transparent transparent;
                position: absolute;
                bottom: -10px;
                left: 50%;
                margin-left: -5px;
            }
            #content:hover .cart{
                display: inline-block;
            }
        </style>
    </head>
    <body>
        <br /><br /><br /><br />
        <div id="content">
            请把鼠标移上来
            <div class="cart">
                提示文字
            </div>
        </div>


    </body>
</html>
效果展示

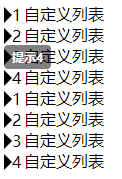
案例13:自定义列表
<!DOCTYPE html>
<html>
    <head>
        <meta charset="utf-8">
        <title></title>
        <link rel="stylesheet" type="text/css" href="new_file.css"/>
    </head>
    <body>
        <ul>
            <li tip="提示1">自定义列表</li>
            <li tip="提示2">自定义列表</li>
            <li tip="提示3">自定义列表</li>
            <li tip="提示4">自定义列表</li>
        </ul>
        <ul>
            <li tip="提示1">自定义列表</li>
            <li tip="提示2">自定义列表</li>
            <li tip="提示3">自定义列表</li>
            <li tip="提示4">自定义列表</li>
        </ul>
    </body>
</html>
css
ul{
    margin: 0;
    padding: 0;
    list-style: none;
    display: inline-block;
    /* 设置每个UL重新计数,默认起始值=0 */
    counter-reset: a 0;
}


ul li{
    position: relative;
    padding-left: 20px;
    /* 设置每个li自增 1 ,默认自增值=1 */
    counter-increment: a 1;
}


/* 自定义列表前面的图案 */
ul li:before{
    /* 引用 li 中定义的自增变量 a 的值 */
    content: counter(a);
    width: 0;
    height: 0;
    position: absolute;
    border-left: 8px solid black;
    border-top: 8px solid transparent;
    border-bottom: 8px solid transparent;
    left: 0;
    top: 4px;
    line-height: 0px;
}


/* 自定义列表后面的鼠标悬停提示文字 */
ul li:after{
    /* 引用 html标记上的 tip 属性值 */
    content: attr(tip);
    position: absolute;
    color: white;
    background-color: black;
    padding: 4px 8px;
    border-radius: 4px;
    font-size: 12px;
    display: none;
}


ul li:hover:after{
    display: block;
    left: 110%;
    white-space: nowrap;
    top: 0px;
}
效果展示
属性选择器
| 选择器 | 描述 |
|---|---|
| [attribute] | 用于选取带有指定属性的元素。 |
| [attribute=value] | 用于选取带有指定属性和值的元素。 |
| [attribute~=value] | 用于选取属性值中包含指定词汇的元素。 |
| [attribute l=value] | 用于选取带有以指定值开头的属性值的元素,只能选择前缀,必须加:“-”。 |
| [attribute^=value] | 匹配属性值以指定值开头的每个元素。 |
| [attribute$=value] | 匹配属性值以指定值结尾的每个元素。 |
| [attribute*=value] | 匹配属性值中包含指定值的每个元素。 |
实例14:输入元素
<!DOCTYPE html>
<html>
    <head>
        <meta charset="UTF-8">
        <title>后代选取器</title>
        <style type="text/css">
            form{
                border-radius: 5px;
                display: inline-block;
                padding: 5px;
                border: 1px solid rgba(0,0,0,0.3);
                box-shadow: 1px 3px 1px rgba(0,0,0,0.4),
                -1px 4px 1px rgba(0,0,0,0.3),
                2px 5px 3px rgba(0,0,0,0.2),
                -2px 6px 3px rgba(0,0,0,0.1);
            }
            input {
                height: 30px;
                margin: 0;
                padding: 0px 10px;
                border: 1px solid rgba(0,0,0,0.4);
                border-radius: 5px;
                font-size: 18px;
                color: #DC143C;
            }
            input[type=button]{
            }
            input:focus{
                border: 1px solid rgba(255,0,0,1);
                outline: 0;
            }
            input:active{
                border: 1px solid rgba(0,0,255,1);
                outline: 0;
            }
        </style>
    </head>
    <body>
        <form>
            <input type="text" placeholder="请输入用户名" />
            <input type="password" placeholder="请输入密码" />
            <input type="button" value="登陆" />
        </form>
    </body>
</html>
效果展示


更多建议: