JUnit - Eclipse 插件
2022-07-26 13:44 更新
为了设置带有 eclipse 的 JUnit,需要遵循以下步骤。
步骤 1:下载 Junit archive
下载 JUnit
| 操作系统 | 文件名 |
|---|---|
| Windows | junit4.10.jar |
| Linux | junit4.10.jar |
| Mac | junit4.10.jar |
假设你在 C:>JUnit 文件夹中复制了以上 JAR 文件。
步骤 2:设置 Eclipse 环境
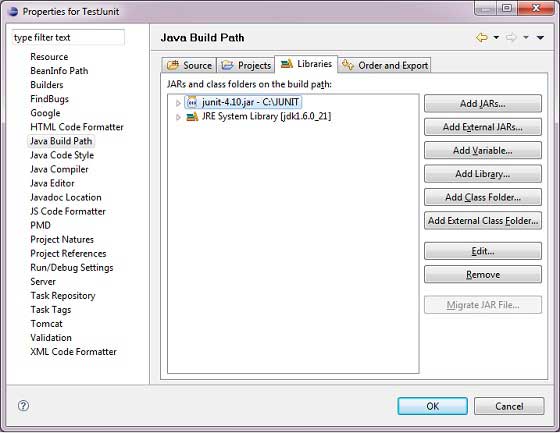
- 打开 eclipse -> 右击 project 并 点击 property > Build Path > Configure Build Path,然后使用 Add External Jar 按钮在函数库中添加 junit-4.10.jar。

- 我们假设你的 eclipse 已经内置了 junit 插件并且它在 C:>eclipse/plugins 目录下,如不能获得,那么你可以从 JUnit Plugin 上下载。在 eclipse 的插件文件夹中解压下载的 zip 文件。最后重启 eclipse。
现在你的 eclipse 已经准备好 JUnit 测试用例的开发了。
步骤 3:核实 Eclipse 中的 Junit 安装
- 在 eclipse 的任何位置上创建一个 TestJunit 项目。
- 创建一个 MessageUtil 类来在项目中测试。
/*
* This class prints the given message on console.
*/
public class MessageUtil {

   private String message;

   //Constructor
   //@param message to be printed
   public MessageUtil(String message){
      this.message = message;
   }

   // prints the message
   public String printMessage(){
      System.out.println(message);
      return message;
   }
} - 在项目中创建一个 test 类 TestJunit
import org.junit.Test;
import static org.junit.Assert.assertEquals;

public class TestJunit {

   String message = "Hello World";
   MessageUtil messageUtil = new MessageUtil(message);

   @Test
   public void testPrintMessage() {
      assertEquals(message,messageUtil.printMessage());
   }
}
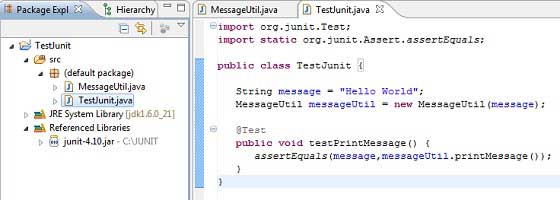
下面是项目结构

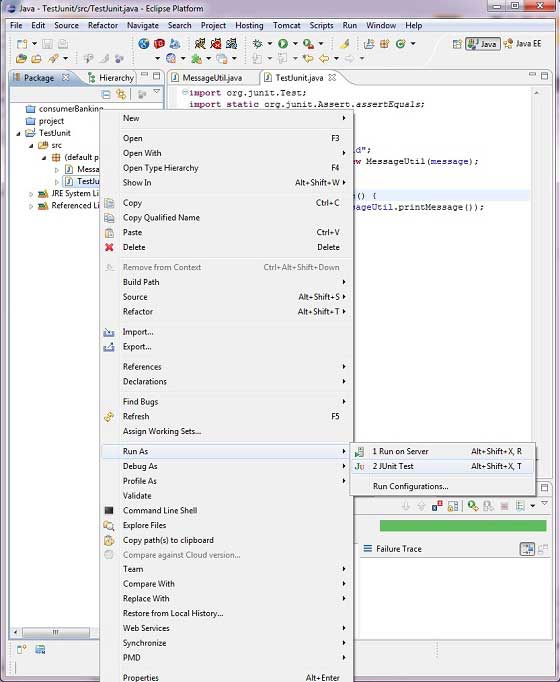
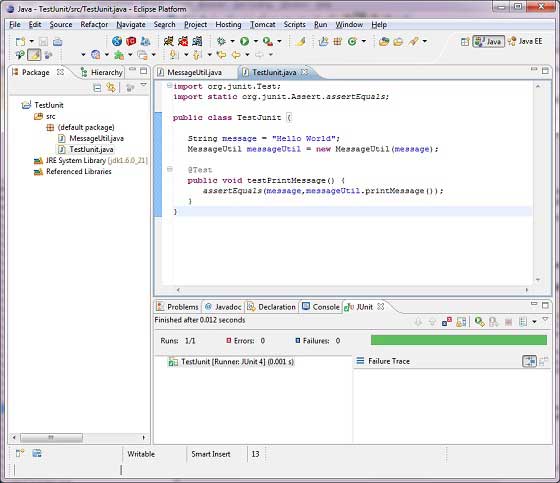
最后,通过右击程序和 run as junit 验证程序的输出。

验证结果

以上内容是否对您有帮助:

 免费AI编程助手


更多建议: